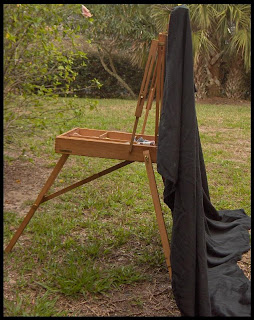
Below is the method I use to photograph 2 dimensional work. I start with an unframed piece. Drawings or works on paper can be taped to a support.
- Set up outside on a bright overcast day with no or few cast shadows
- Arrange piece on a black background
- Level the piece
- Set up camera on tripod at center of piece at closest distance to fill the frame.
- Turn off flash
- Adjust camera settings according to built-in or separate light meter
- Use highest mega pixel setting available & adjust any special settings- know your camera's capabilities*
- Level the camera
- Take photo with timer or remote button release
- Crop/Adjust image size with computer program
For small pieces I use a French easel to secure the piece. For the black background I use a black cotton sheet. Some people use black velvet. I use a small level on two sides of the stretched canvas to level it (top or side and front or back). The camera is leveled the same way. I have eyeballed or estimated the left and right side of the canvas to be same distance from the camera (or parallel to the camera). For larger pieces this would be measured for accuracy. If needed, I then use a program on a pc to adjust the image size and to center it.
* I wrote about some special settings here: Photographing Artwork 2.
Have I forgotten anything? What would you add?
Please post your contributions by clicking 'comments' below.


No comments:
Post a Comment